Pickles are irresistible. A few years ago, house-fermented pickled vegetables became fashionable at restaurants. Many of us have trouble getting enthusiastic about veggies, but I am solidly behind fermented vegetables.
Escabeche refers to spicy pickled vegetables, often served as a side dish at Mexican restaurants. The tasty veggies make wonderful add-ons for tacos. And we have found them just right for salads.
It is amazingly easy to create your own pickled vegetables. After a few days of fermentation, they can go into the fridge for weeks or even months. I haven’t tried canning them yet–we eat them too fast. But you could can them and then you could keep the jars on the shelf.
And remember the health benefits of eating fermented foods. To quote the BBC, “including probiotic-rich fermented foods is thought to bring the gut back into balance and support the immune system.” We can all enjoy those benefits.
As for equipment, I used wide-mouth pint Mason jars that fitted nicely into the back of our fridge after the vegetables fermented. To keep the vegetables submerged in the brine and allow carbon dioxide to escape, I recommend Pickle Pipes + Glass Weights.
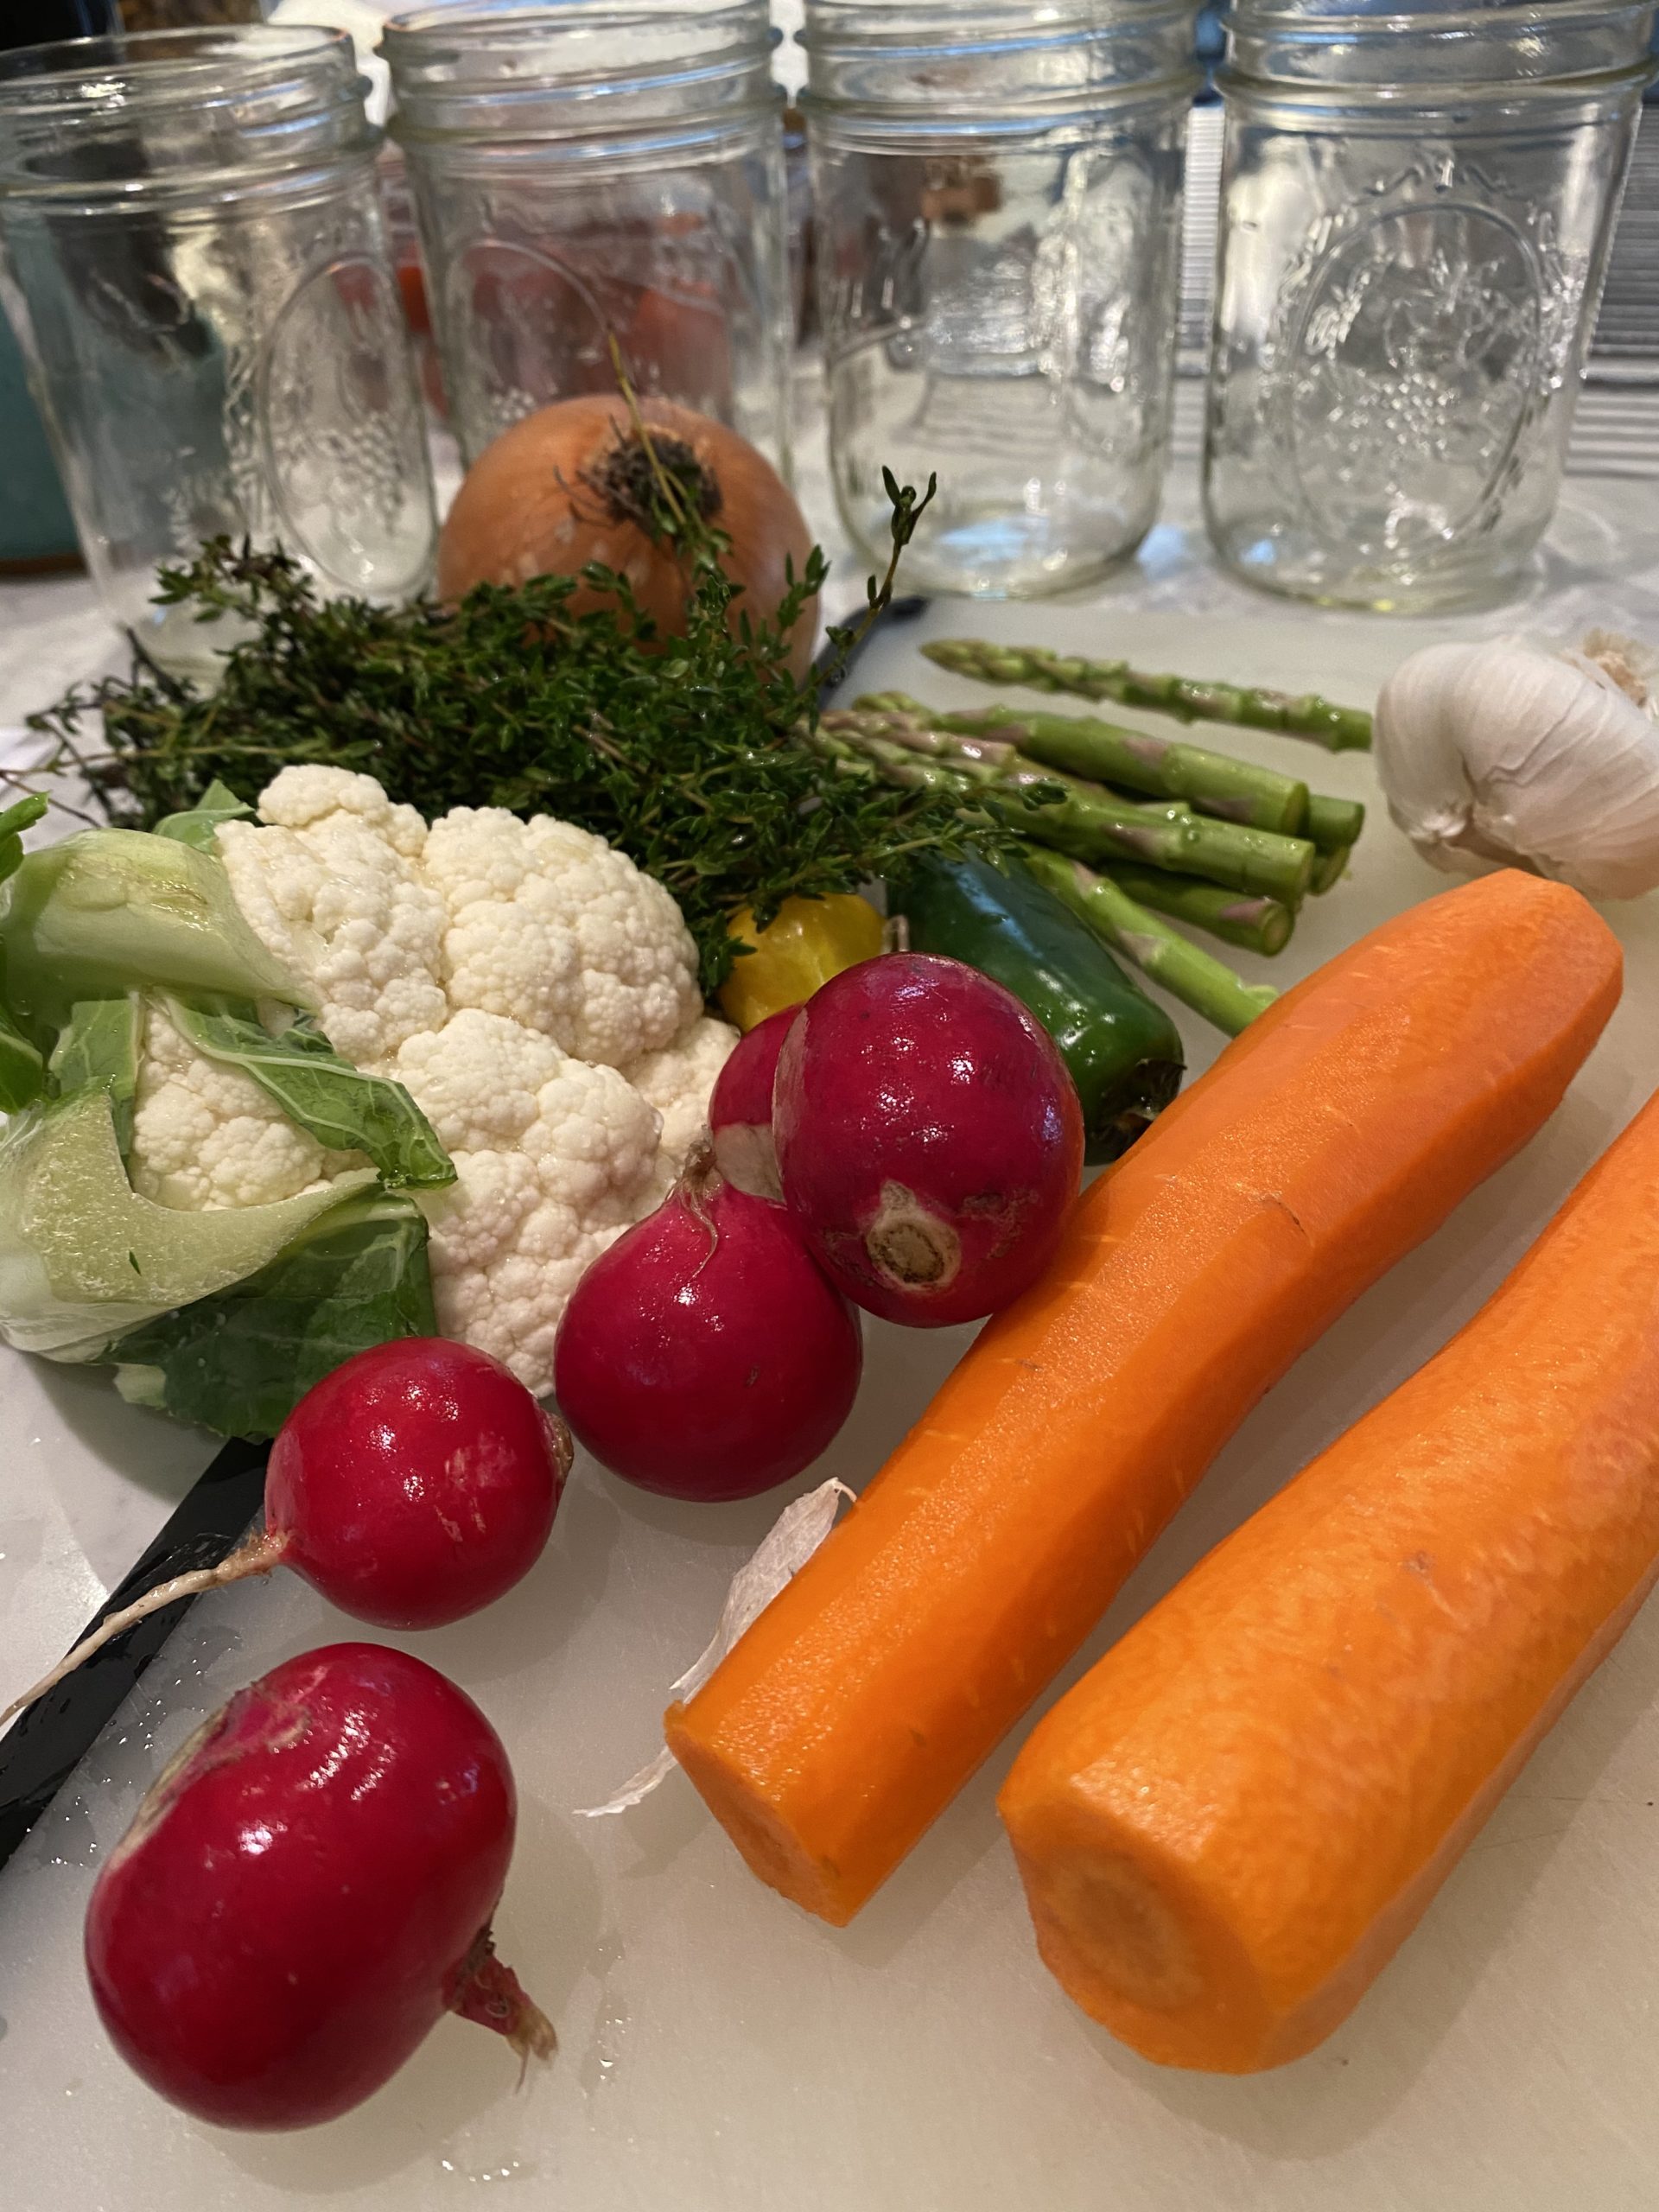
This recipe is adapted from the Fans of Fermentation blog and makes 2 quarts of pickled vegetables. You can choose your favorite vegetables from the ones below as long as you end up with about 7 cups of cut-up vegetables.
6 cups water
3 tablespoons (72 grams) fine sea salt
2 medium carrots, peeled and sliced into coins or ribbons
7 medium radishes, sliced thinly
1 medium onion, sliced in half then thinly into half rounds
2 jalapeño peppers, sliced thinly (remove seeds for less heat)
3 cloves garlic, sliced thinly
6 sprigs fresh oregano
1/2 cauliflower, cut into small florets
12 medium stalks of asparagus, cut into 2-inch pieces
Make salt brine. Heat 2 cups of water to almost boiling. Add the salt. Stir to dissolve the salt. Add 4 more cups of water from the cold-water tap and stir. Allow the salt brine to cool to room temperature before using. Meanwhile you can prep the vegetables.
Wash vegetables to remove dirt, but don’t scrub them hard because you want to keep some good bacteria for fermentation.
Cut up vegetables as suggested above.
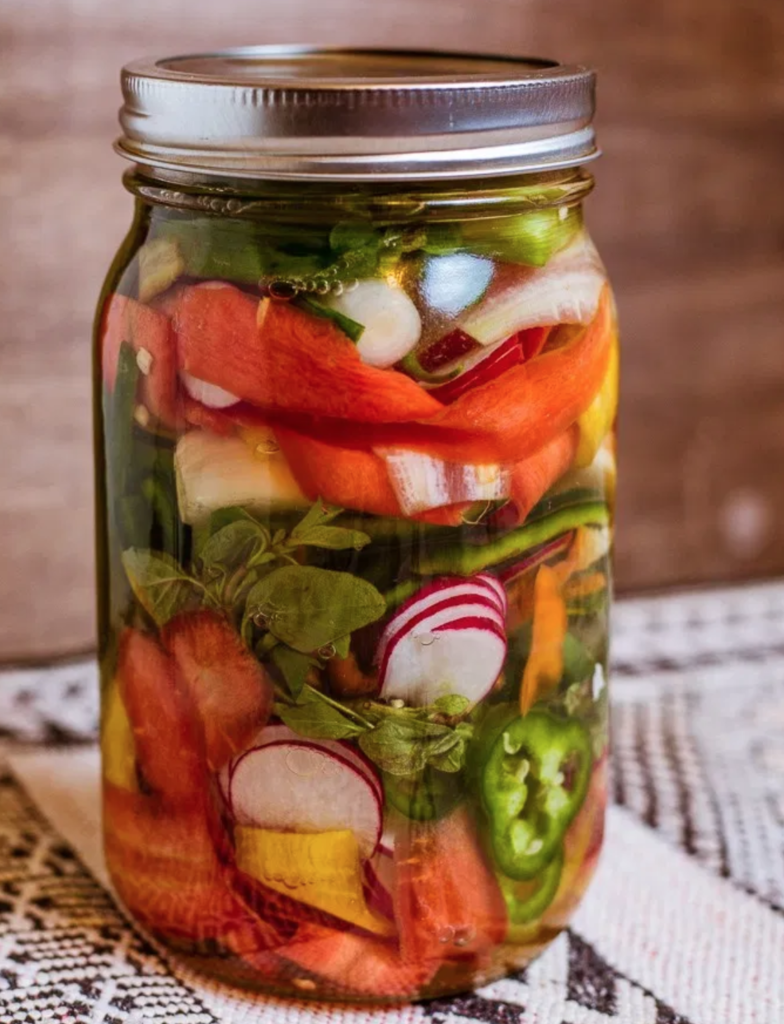
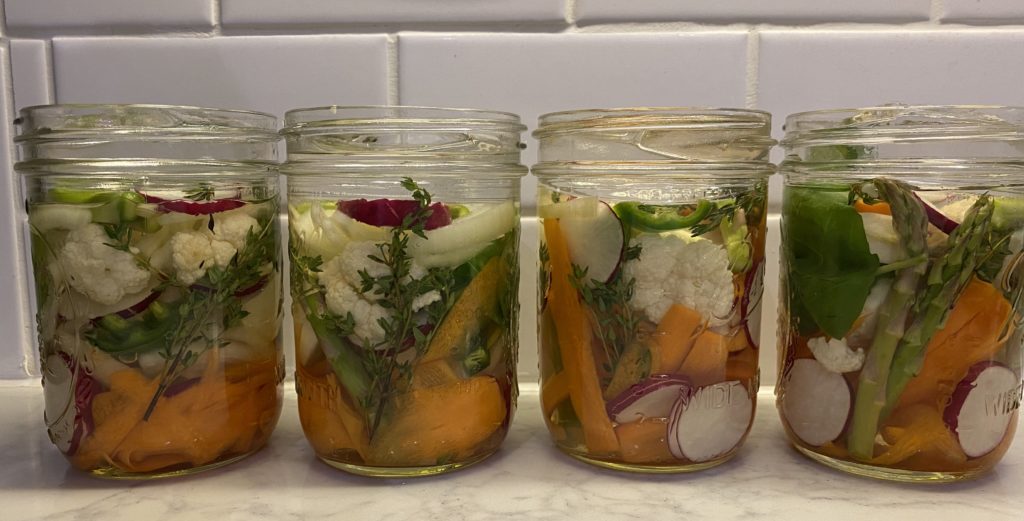
Add vegetables to jars. You can do this artistically as the folks at Fans of Fermentation did in this great photo. Push the veggies down to reduce space between the pieces. Leave about an inch of space above the veggies for the glass weight.
Add brine to jars. Pour the room-temperature salt brine into each jar, again leaving enough room to place a glass weight in the jar if you are using the weights. You might have leftover brine.
Place Pickle Pipes. Add Pickle Pipes with Mason jar bands or your preferred fermentation regulator to each jar.
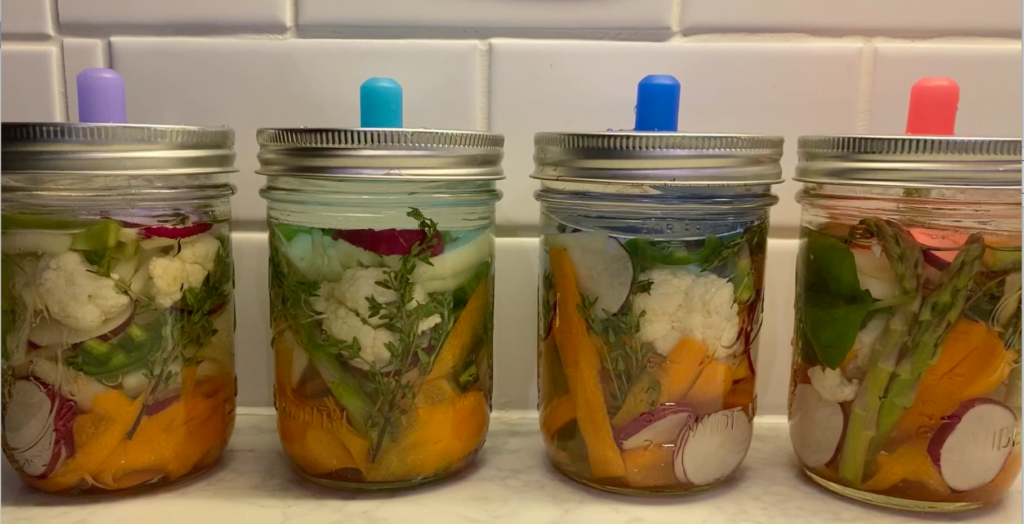
The magic of fermentation. Put the jars in a cool place without sunlight. Allow 3-7 days for fermentation to proceed. You will start to see bubbles within a day or two. After day 3, taste-test a vegetable daily to see if it meets your demands for crispness and taste. When you are happy, remove the glass weights and fermentation regulators from the jars. Add the normal Mason jar lids with bands. Store in the refrigerator.
You will find that the pickled vegetables lose their marvelous color. The carrots remain orange and the asparagus becomes a less vivid green, but the radishes fade to white. This is normal and they are still delicious.